Overview
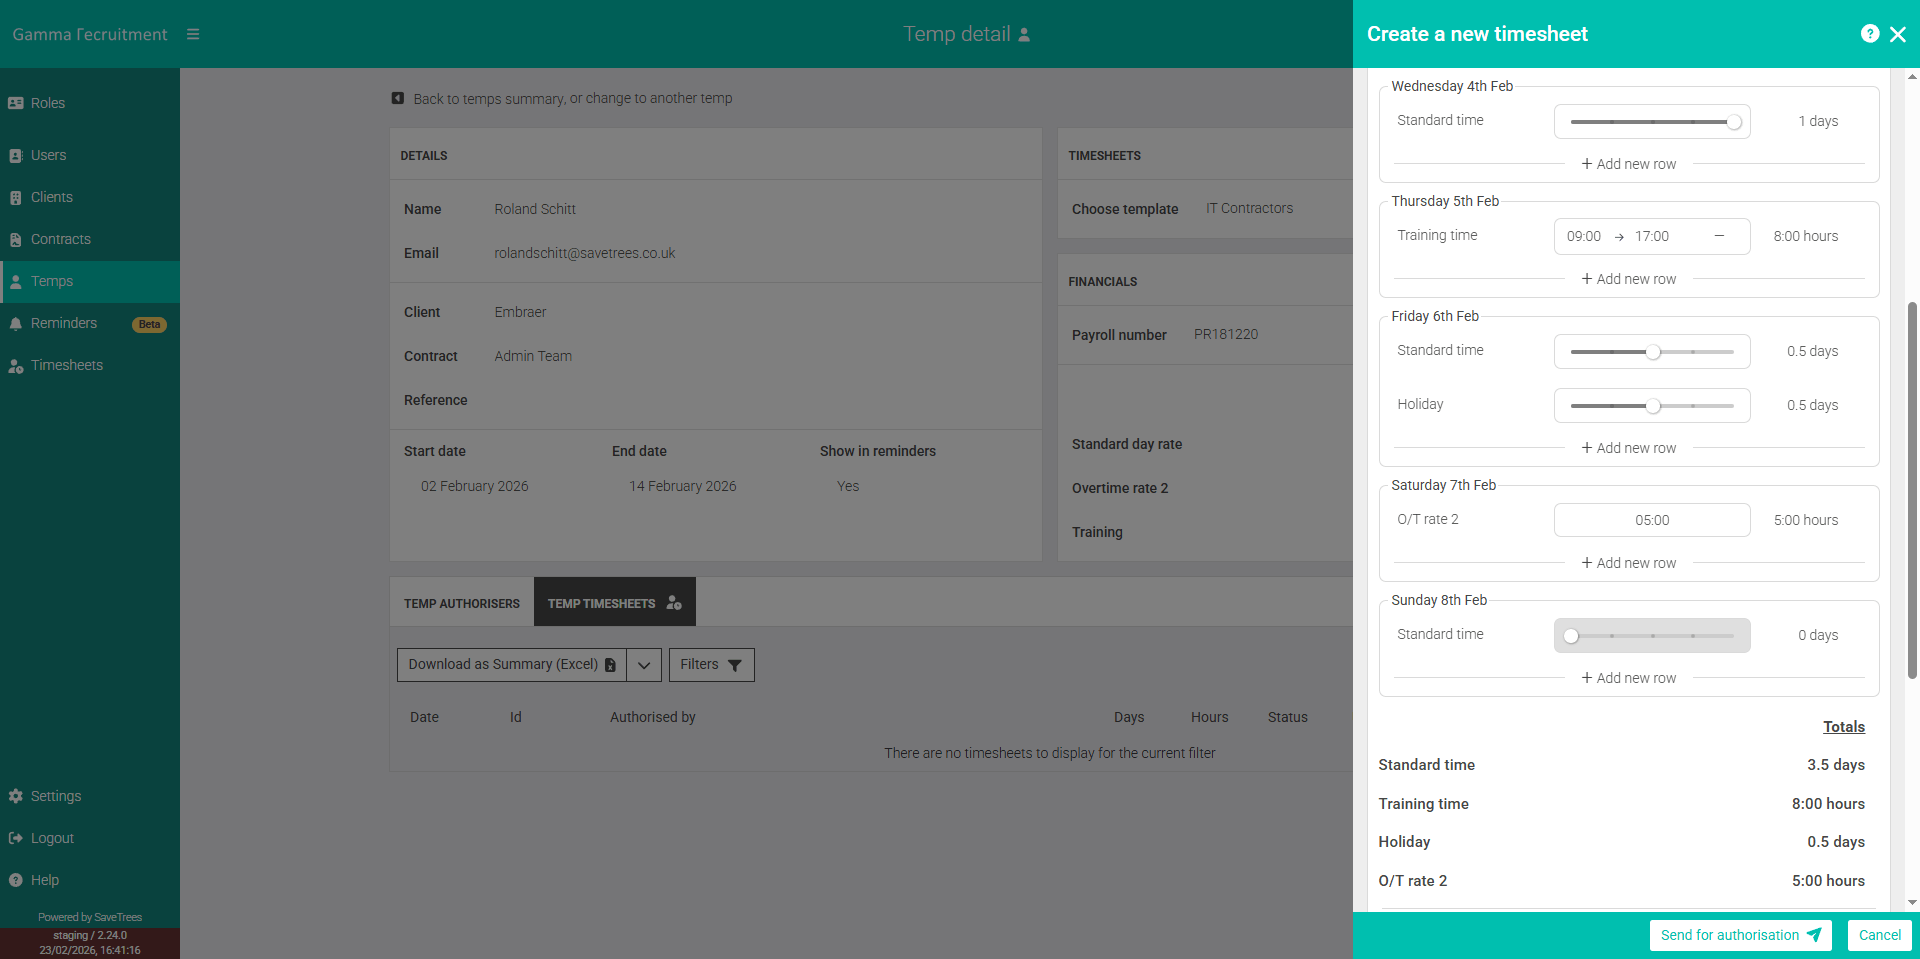
Here’s an example of how you might set up a timesheet for an IT contractor. In this case, the contractor wants to track billable client work separately from non-billable internal time.
By creating a separate CFT for each type of work, you can clearly distinguish what can be invoiced and what cannot.
Step 1: Create the Custom Field Types (CFTs)
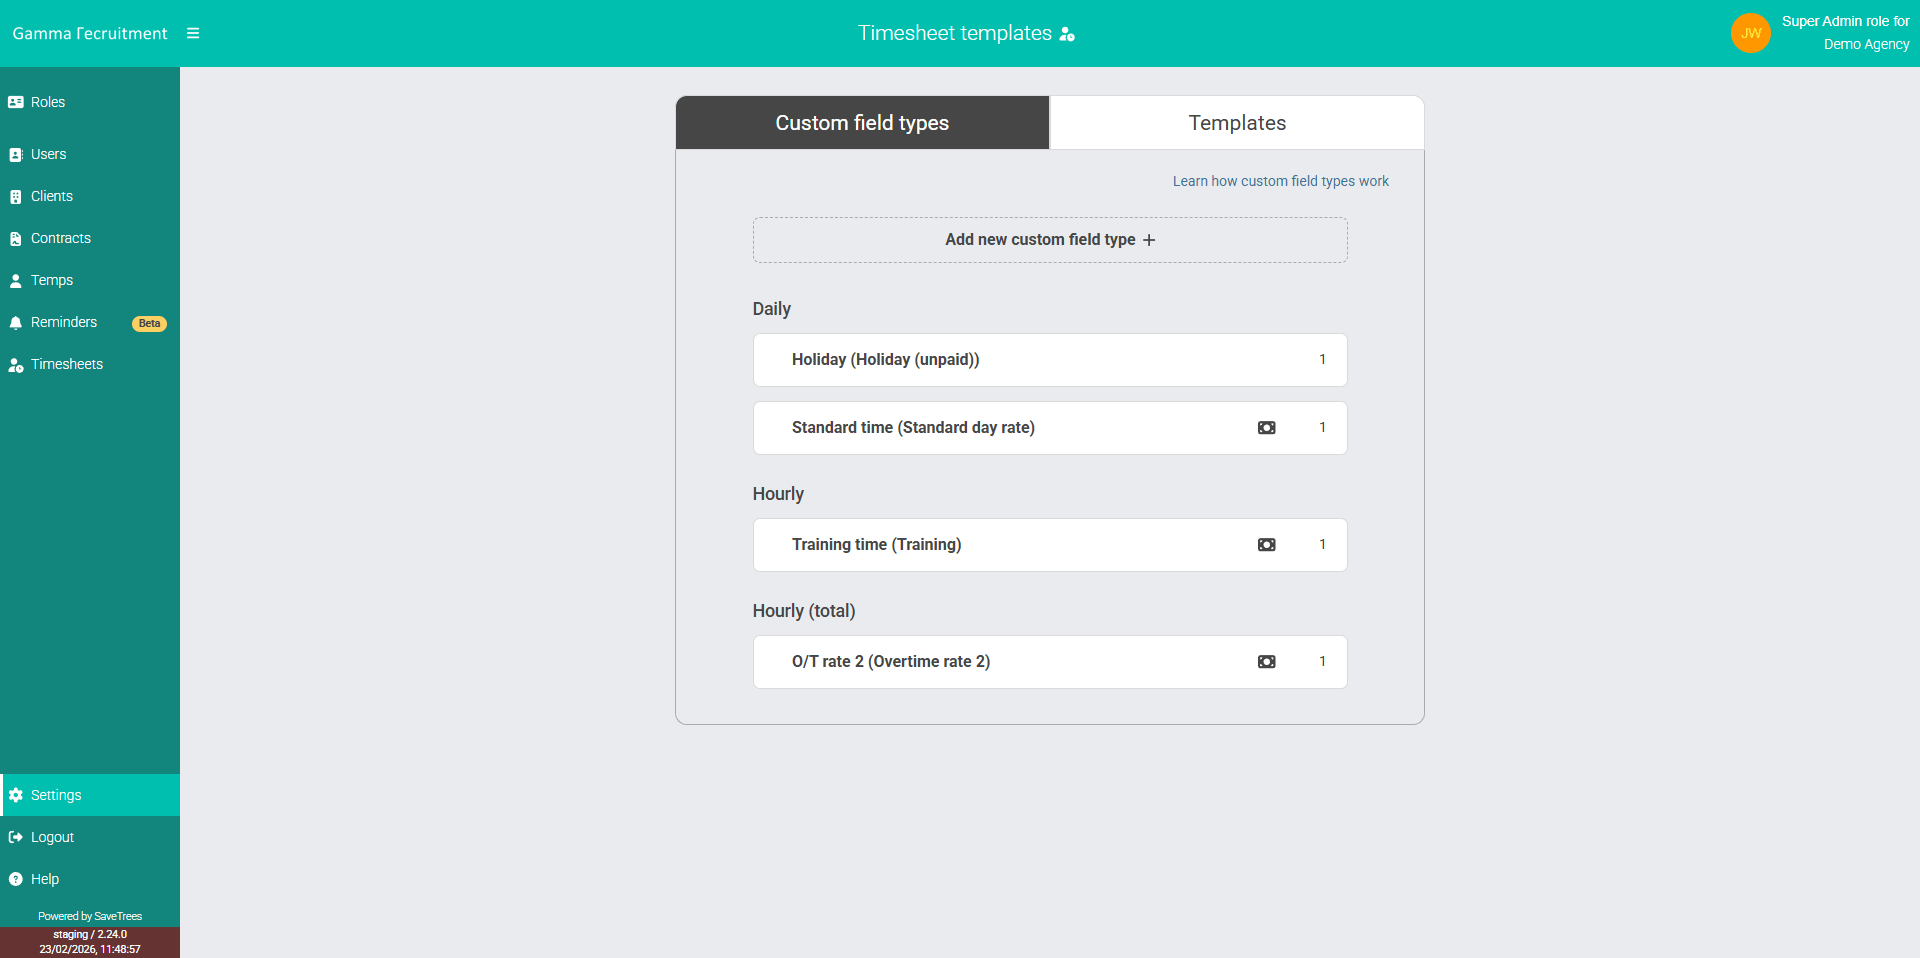
First, create the CFTs. For this example, we want to record four types of time:
| Field Name | Display Name | Entry Type | Track Financials | Hidden/Shown |
|---|---|---|---|---|
| Standard day rate | Standard time | Daily rate | Yes | Shown |
| Overtime rate 2 | O/T rate 2 | Hourly (total) | Yes | Hidden |
| Training | Training time | Hourly | Yes | Hidden |
| Holiday (unpaid) | Holiday | Daily rate | No | Hidden |
Step 2: Create the Timesheet Template
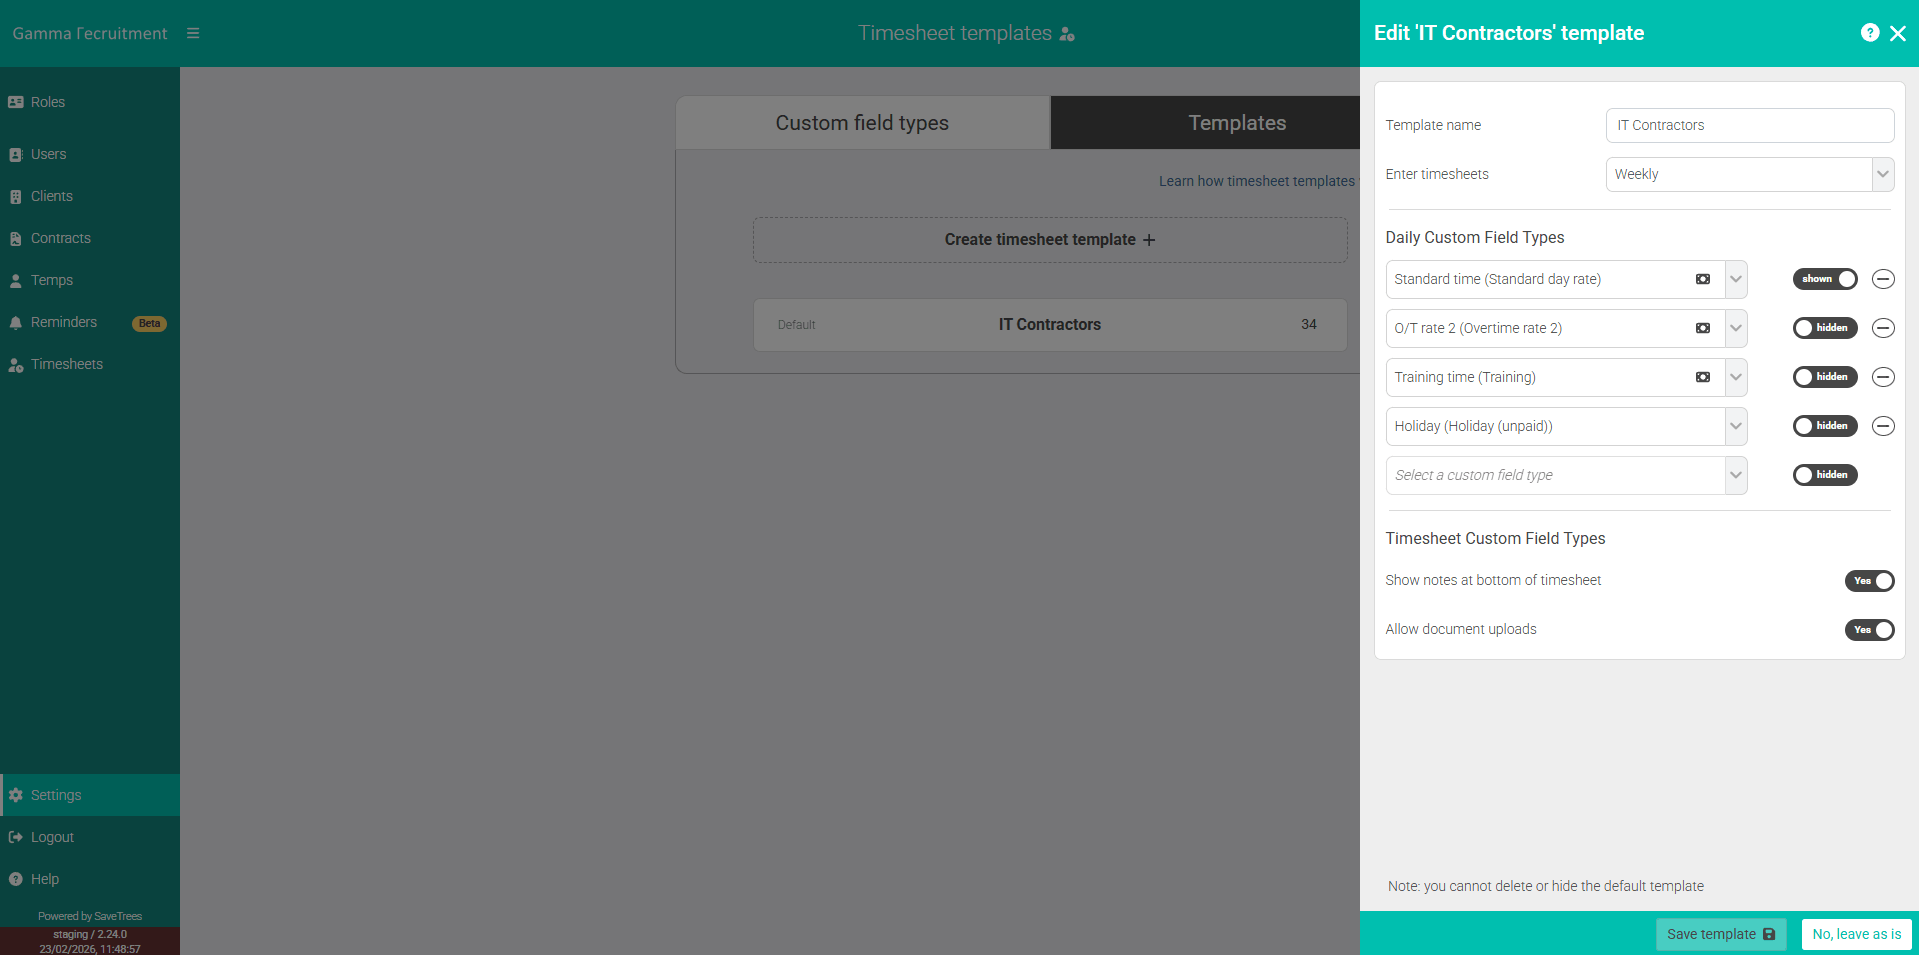
Now that the CFTs are set up, add them to a new Timesheet Template.
Choose a clear name that makes sense to both you and the contractor. Something like “IT contractor timesheet” works well.
When adding the CFTs:
- The order you add them is the order they will appear on the timesheet.
- You can choose whether each CFT is visible by default or hidden using the toggle on the right.
If a CFT is visible, it will always appear on the timesheet. If it’s hidden, the contractor can still add it using “Add new row”, but it won’t show automatically.
For example, if training is only logged occasionally, you may prefer to keep that CFT hidden by default.
Making this template a default
If most of your workers are IT Contractors, you can set this template as the default. That way, any new worker added to the system will automatically be assigned to it. You can always change a worker’s template later if needed.
Step 3: Set pay and charge rates
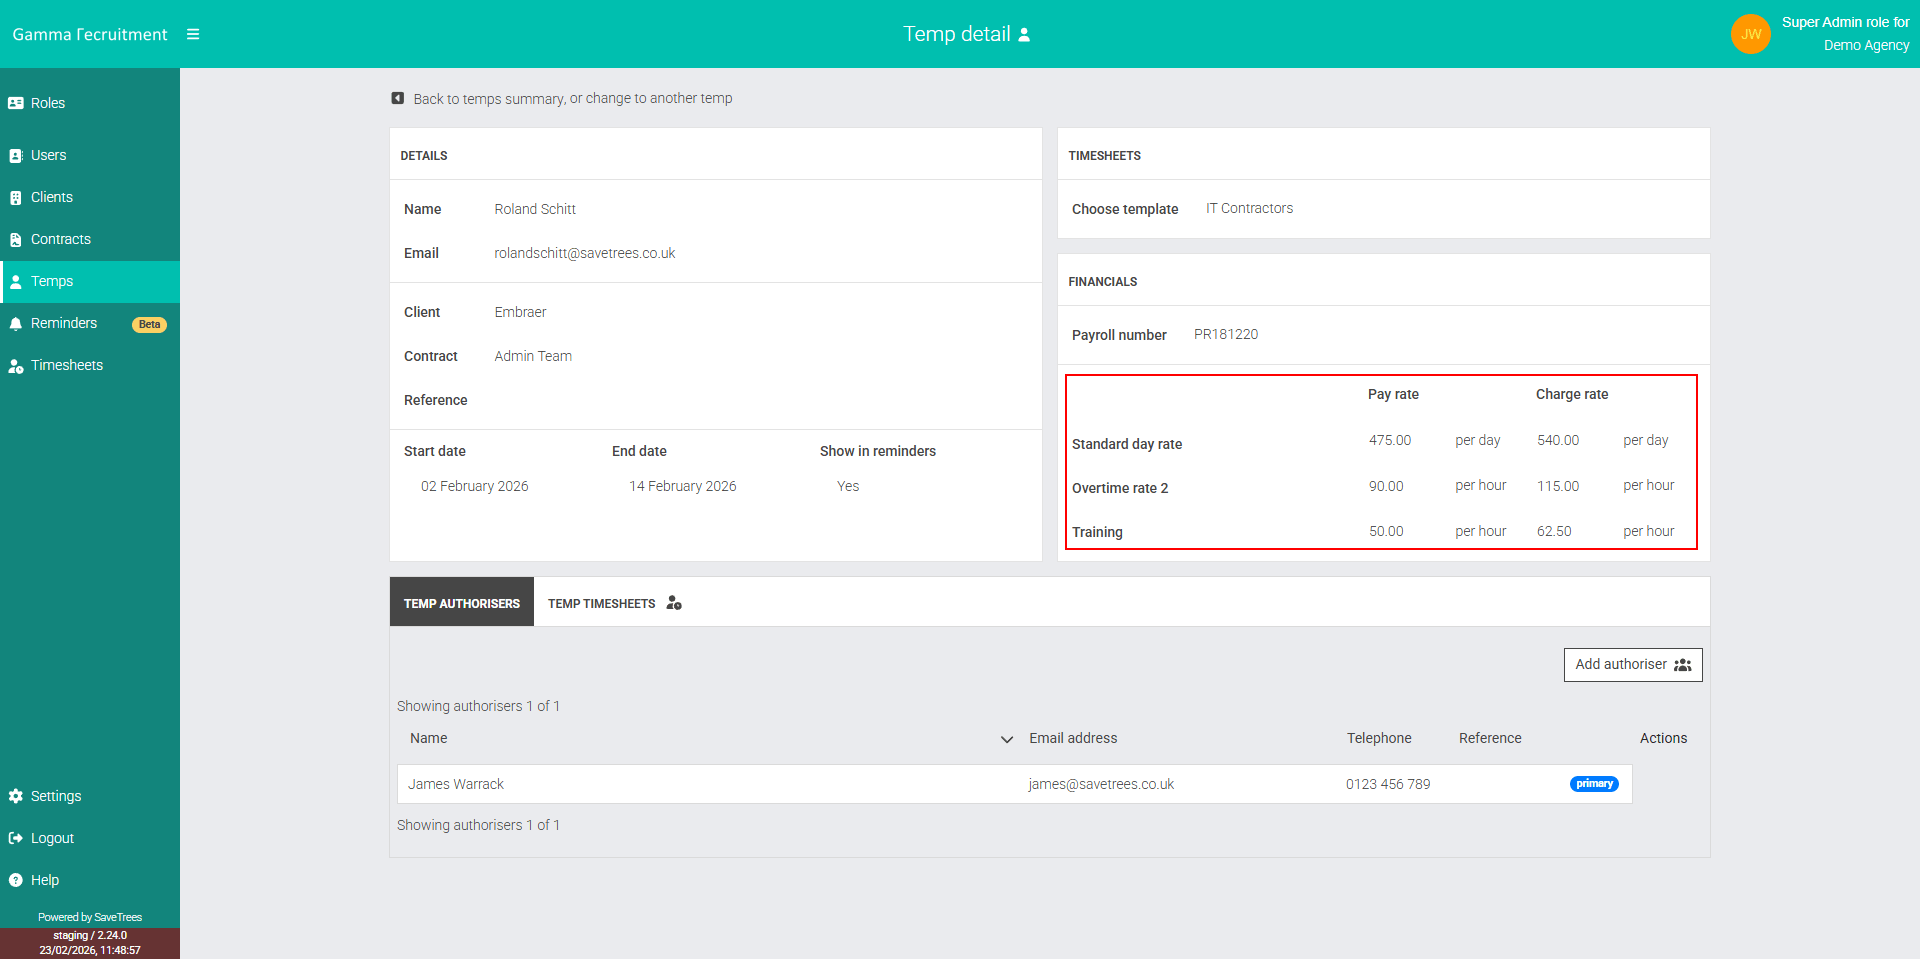
If you've decided to track pay and charge rates for some of the CFTs, make sure that you set these for any workers who are using this template.
To do this, navigate to the contractor's detail page and hover over the Financials box, click the edit icon in the top right, make the changes you need and hit 'Save'.
That's it, all done!
Your IT Contractor can now submit timesheets with all of the fields you set in the previous steps.